How to use Google DNS Servers
18 Nov 2017If you are frequently running into the Resolving Host status message in Chrome and/or are generally having slow page loads, it could be because your DNS lookups are taking longer than they should. Unsurprisingly, the DNS servers provided by your ISP can be pretty bad, but you are free to use other open alternatives (the two most common being Google and OpenDNS) which could give you faster responses.
Follow these steps to use the open Google DNS servers within Windows 10 (there are plenty of alternative guides online for other OS’s):
Start -> Settings -> Network & Internet
Click on Change adapter options
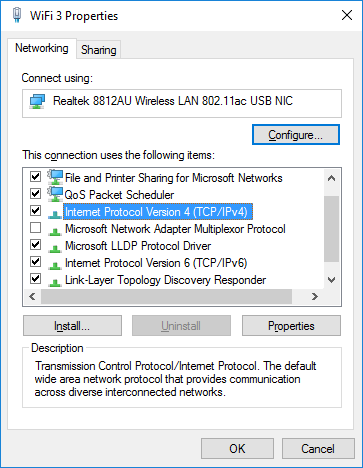
Select which network adapter you are using (WiFi/Ethernet depending on your setup). Right click and choose Properties.
In the list of configuration options select Internet Protocol Version 4 (TCP/IPv4). Then click Properties.
In the bottom section, select Use the following DNS server addresses. Fill the boxes with the following depending on which provider you wish to use:
Preferred: 8.8.8.8
Alternate: 8.8.4.4
Preferred: 208.67.222.222
Alternate: 208.67.220.220
For Google DNS, it should look like the following:
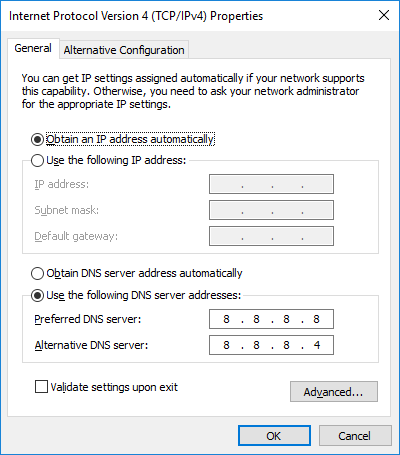
Hit OK and you should be good to go. There are also equivalent IP addresses for IPv6 if you need them. Hopefully your DNS lookups will not be a little more performant. You might have the potential downside of Google knowing even more about your browsing habits, but if you use Chrome then they probably know all that already - so you might as well enjoy a faster experience!