Kotlin & Java CI with Github Actions
12 Apr 2020If you have a Kotlin/Java project of any reasonable size, you probably want some kind of CI (Continuous Integration) process running alongside the main development workflow. Commonly this takes the form of something like:
- running a small build on every pull request before merging
- running a complete build on every change pushed to master (or any other branch) - including integration tests etc
- automatically run deployment steps e.g to Heroku, AWS or Github Pages
- ensure that your project builds and runs on a wide variety of devices e.g different JDK versions/OS’ - or really that it can build on a machine that isn’t your local box
- in general your main branch contains a fully working version of your project
- run static code analysis tools or linters
- anything else that can be automated..
Previously, the most widespread tool for this is is probably TravisCI (which is free for open source usage). Now however, there is an alternative that’s built into Github itself - Github Actions. You can think of it as pretty much the same as other CI tools out there, but you get the added benefit of full integration with Github, so now everything can be in the same place!
Creating a a Gradle Build Action
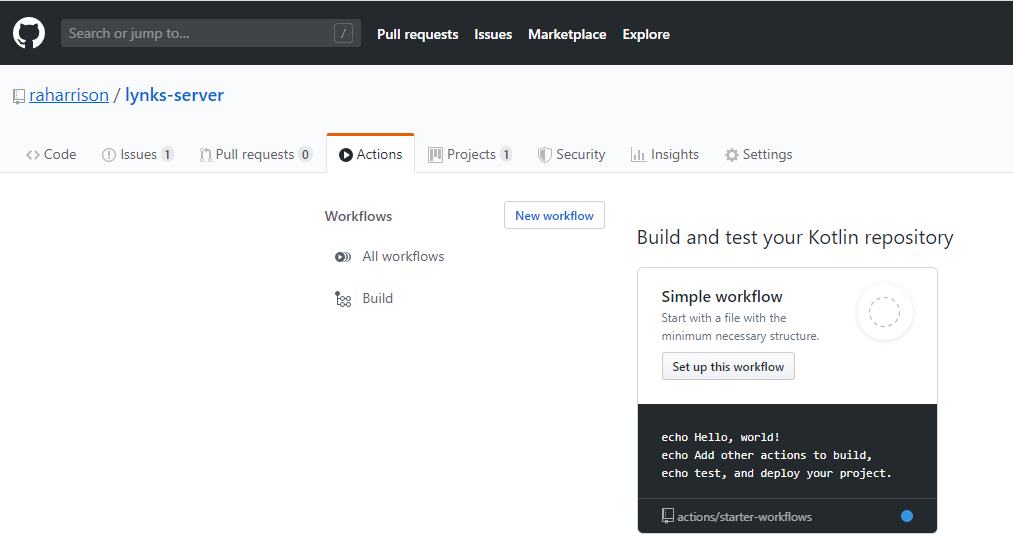
Your repository should have a new tab called Actions which is your new portal for anything CI related. Once you click on the tab you will be able to create your first Action. By default, Github will suggest some common workflows relevant to your project (e.g if it’s a Node project run npm run build and npm test). These take the form of open source packages hosted within other repositories, but you can of course create your own custom actions taking the best bits from each.
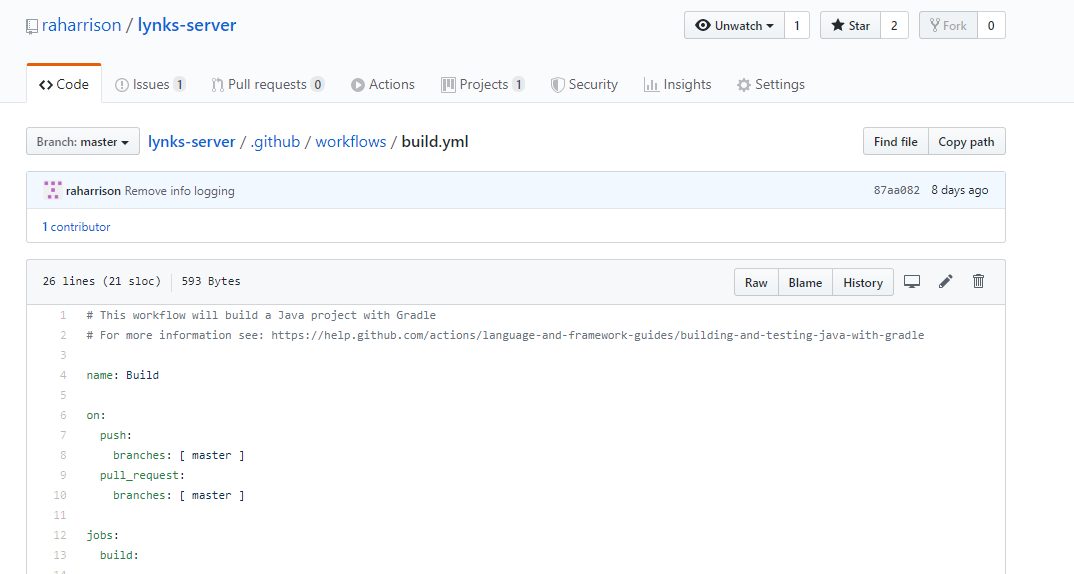
Actions take the form of simple .yml files which describes the workflow and steps to execute. In our case, we want to build and test our Kotlin or Java project. This example will use Gradle, but Maven will also work just as well. The below configuration is all we need to build our repo:
name: Build

on:
    push:
        branches: [master]
    pull_request:
        branches: [master]

jobs:
    build:
        runs-on: ubuntu-latest

        steps:
            - uses: actions/checkout@v2
            - name: Set up JDK 11
              uses: actions/setup-java@v1
              with:
                  java-version: 11
            - name: Grant execute permission for gradlew
              run: chmod +x gradlew
            - name: Build with Gradle
              run: ./gradlew build
Thankfully the YAML markup is pretty readable. In the above action we perform the following steps:
- Instruct Github to execute this Action on any push to the
masterbranch, or pull requests targetingmaster - Create a single job called
build(you can have as many as you want within a singleAction) which runs on an Ubuntu container. There are plenty of other options for which OS image you want to target (runs-on: windows-latestorruns-on: macos-latest). This is great to make sure your project will build and run on a range of different machines. - Perform a Git checkout of your repo in the new virtual environment. This step makes use of the
usesstatement which allows you to reference other packaged actions - in this case actions/checkout. This is where things start to get a lot more powerful as you can begin to publish and reuse workflows from the community - Setup a
JDKusing another action provided by Github. In this case we just use JDK 11, but you could run these steps with a range e.g 8 to 14 to ensure compatibility - Run a simple shell script to give permissions on the Gradle wrapper. Similarly you could run pretty much any shell scripts you need
- Execute the Gradle wrapper script to perform a complete build and test of our project. Note that this is exactly what we would do if we were to do the same locally - nothing needs to change just because we need to run this in a CI environment.
That’s it to run a simple Gradle build for our Kotlin or Java project. Github will instruct you to commit the .yml file into the .gitub/workflows directory in the root of your repo so that it can be picked up properly.
Running the CI Workflow
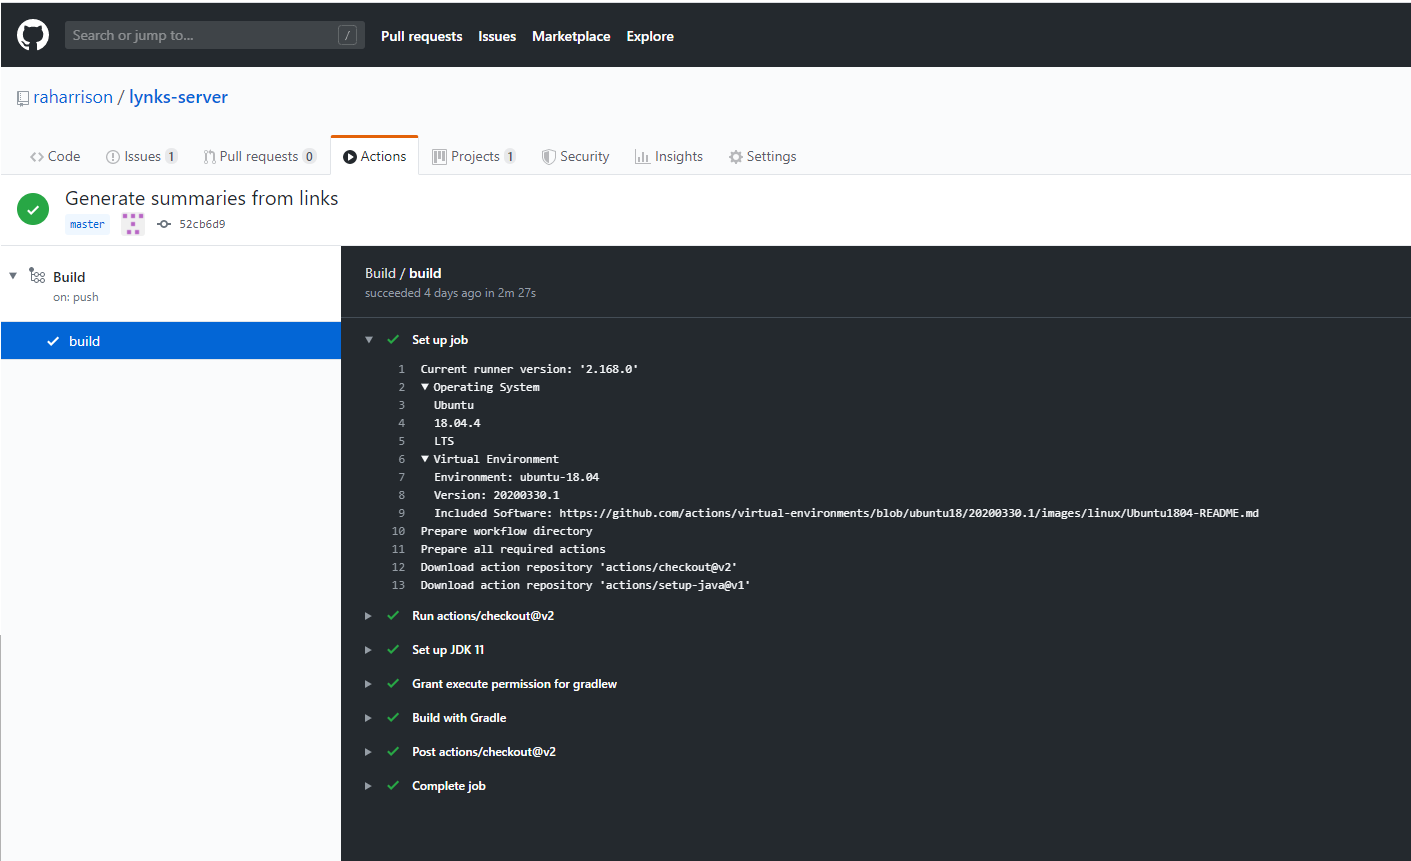
Because we just set up our Action to be run automatically on any PR or push to master, there is nothing else we need to do to start utilising our new continuous integration process. In the Actions tab you will see all builds of your project alongside all log output. You will get notified in the event that your build process fails by email.
Caching Build Dependencies
If you run the above Action you will probably notice that it takes some time to execute. This is because it has to go out and download all of your JAR dependencies every time it runs. To speed this up, you can use a caching mechanism. After your workflow is executed successfully, the local Gradle package cache will be stored in Github to allow it to be restored on other subsequent runs.
steps:
    - uses: actions/checkout@v2
    - name: Set up JDK 1.8
      uses: actions/setup-java@v1
      with:
          java-version: 1.8
    - name: Cache Gradle packages
      uses: actions/cache@v1
      with:
          path: ~/.gradle/caches
          key: ${{ runner.os }}-gradle-${{ hashFiles('**/*.gradle') }}
          restore-keys: ${{ runner.os }}-gradle
    - name: Build with Gradle
      run: ./gradlew build
More information
This just touches the surface of what you can do with Github Actions (it is a CI solution after all), focusing specifically on Kotlin or Java projects using Gradle. There are of course an ever increasing number of other supported languages/tools being added (Node, Python, Go, .NET, Ruby), alongside a number of other nice use cases integrating into other aspects of Github:
- Create Github releases automatically after successful builds
- Mark issues and pull requests as stale if not updated recently
- Automatically label new pull requests based upon predefined criteria
- Run within Docker containers, Kubernates and AWS uploads
- Static analysis and linting
- Automatically publish build artifacts to Github Pages
See the below links for more info and how to find some of the more popular packages created by the community. There is probably already something covering your use case:
-
Main Github Docs - https://help.github.com/en/actions
-
Github Action Marketplace - https://github.com/marketplace?type=actions
-
Curated list of helpful actions - https://github.com/sdras/awesome-actions